1. PixInsight LE
|
Pixinsight LE is the "lite" or free version of the full PixInsight product from Pleiades Astro Software, which is currently in Beta test. To get PixInsight LE go to the Pleaides website at http://www.pleiades-astrophoto.com/. The downloads page for PixInsight LE is http://www.pleiades-astrophoto.com/download/LE/index.html There is much useful information on the Pleaides website and after following this tutorial I recommend having a look at their more detailed tutorial web pages at http://www.pleiades-astrophoto.com/tutorials/index.html and the excellent videos at http://www.pleiades-astrophoto.com/videos/index.html.
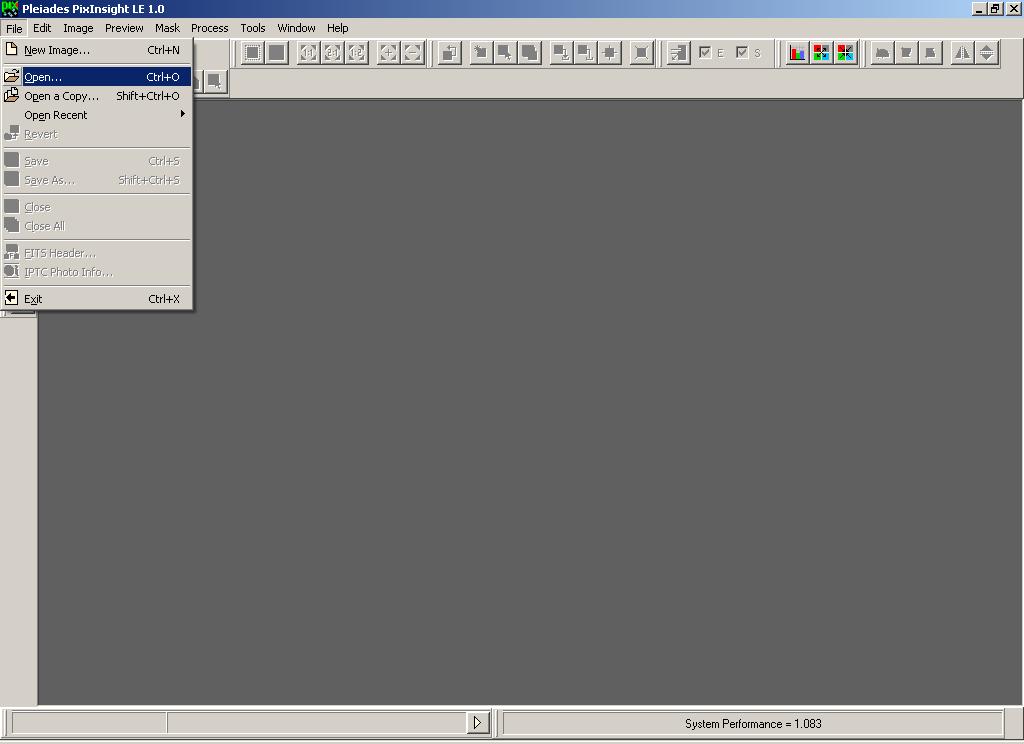
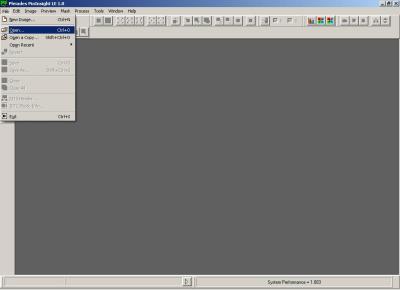
When you start PixInsight LE you will see this window. To open the file for processing choose Open on the File menu.
|
|
|
|
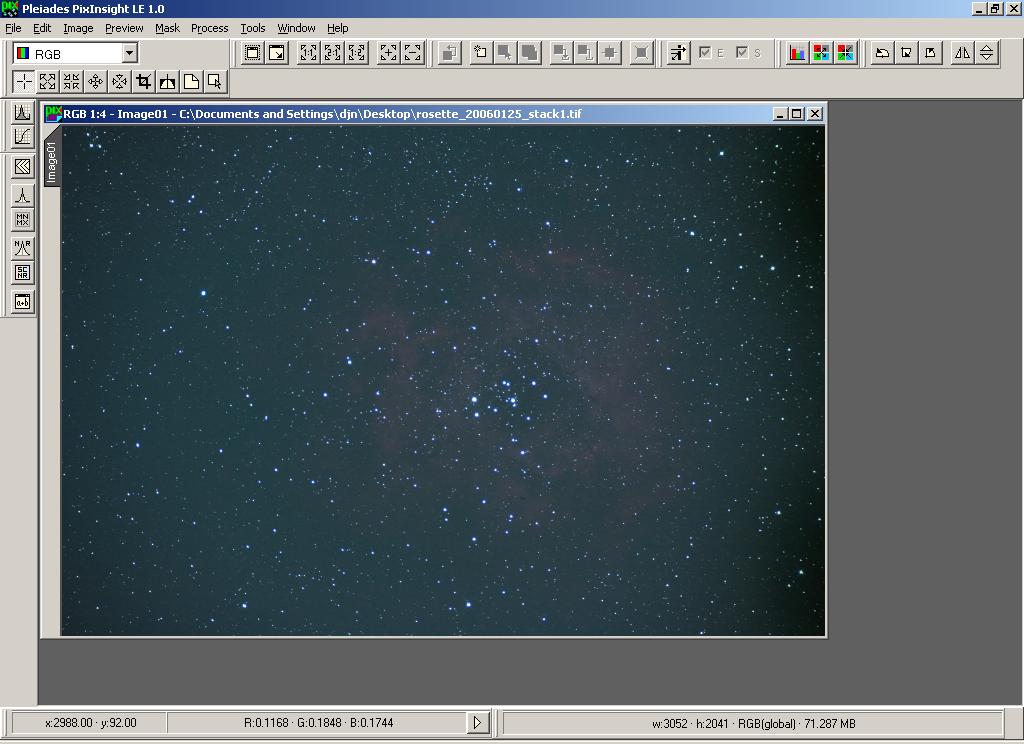
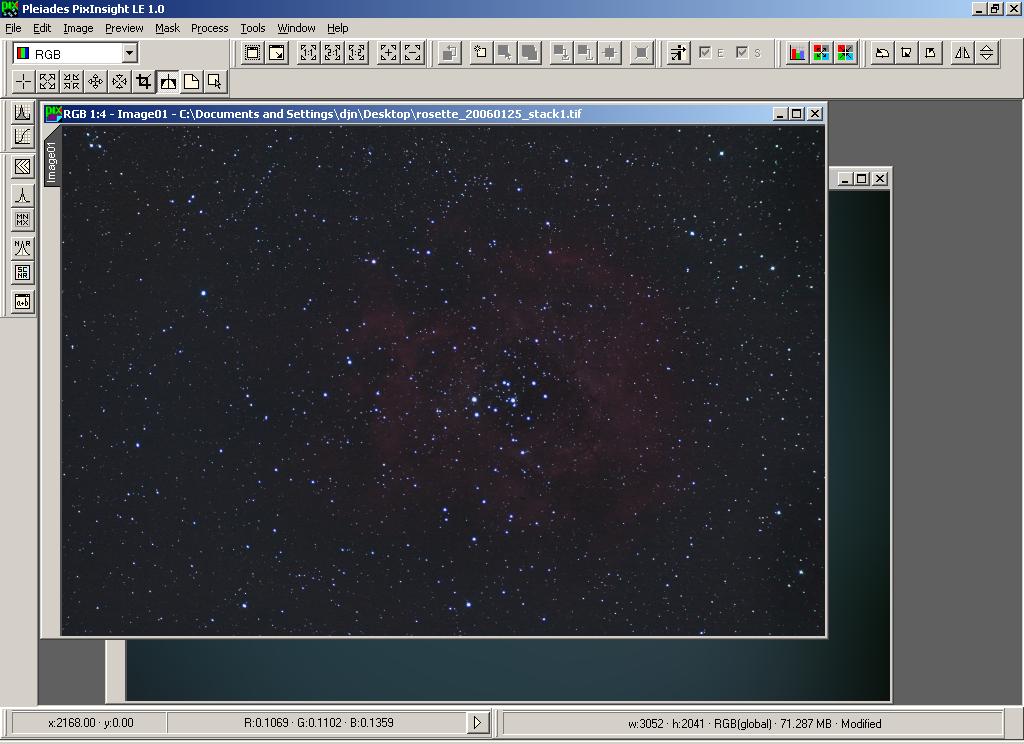
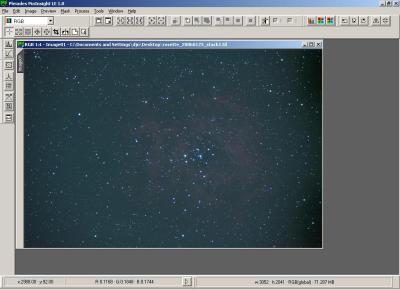
This file is in 16-bit TIFF format, and is a colour image. PixInsight LE can also handle black and white images in FIT format, or standard windows BMP files. It can open files in JPG format, although this is not recommended because of the lower quality. Note also that this file is 3052x2041 pixels (see the w: and h: labels on the status bar at the bottom of the window). PixInsight LE is showing the program at 25% of full size, as shown by the title of the image window.
|
|
Pixinsight works via "processes" which can be applied to an image. For each adjustment you want to make to an image, you load up the process dialog window, set the parameters using the controls, and apply the process to the image. Processes with specific value sets can be saved and loaded for audit or so you can apply the same processes to several image files.
|
2. Dynamic Background Extraction
|
The first process we are going to use is to remove the background sky glow and gradient -- see the vignetting evident in this image, prominent on the right -- , giving us a hopefully flat-looking image. This is done by using PixInsight LE's Dynamic Background Extraction facility to create an image comprising just the background glow in the image. This background image will then be subtracted from the main image.
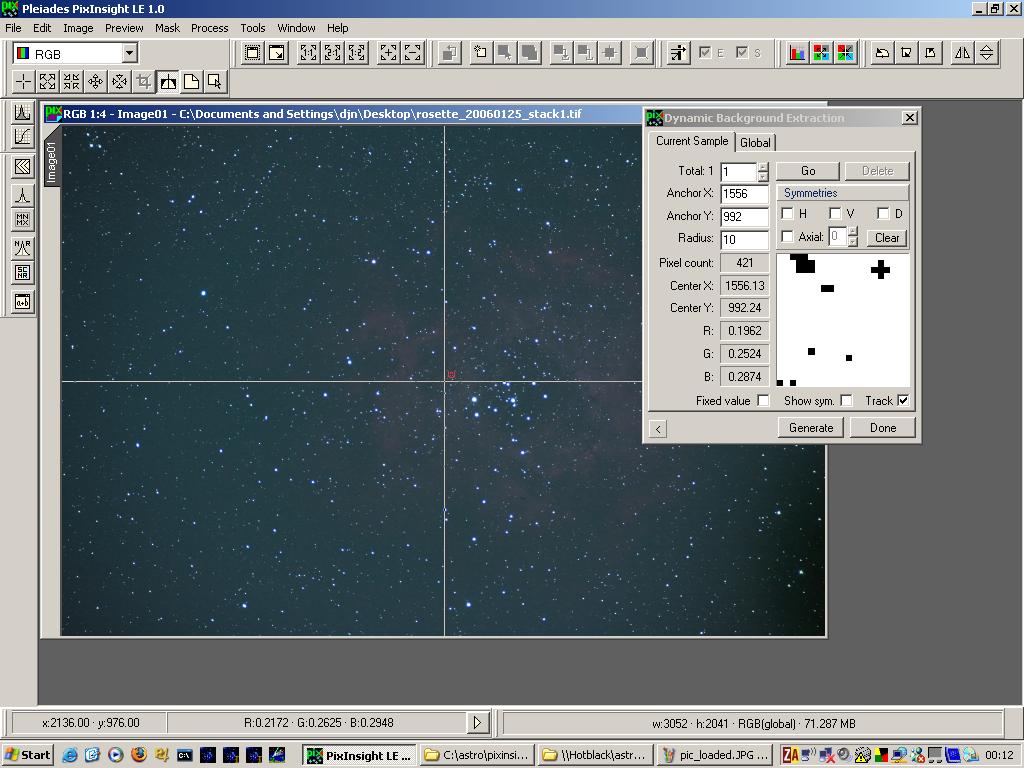
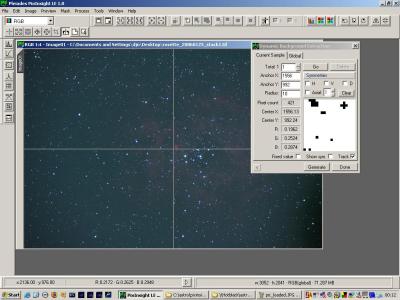
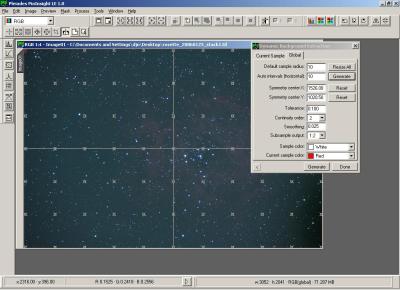
Click the DBE button on the toolbar. The button looks like this: . The first step is to click roughly in the centre of the image. You will see the DBE dialog box appear as shown. . The first step is to click roughly in the centre of the image. You will see the DBE dialog box appear as shown.
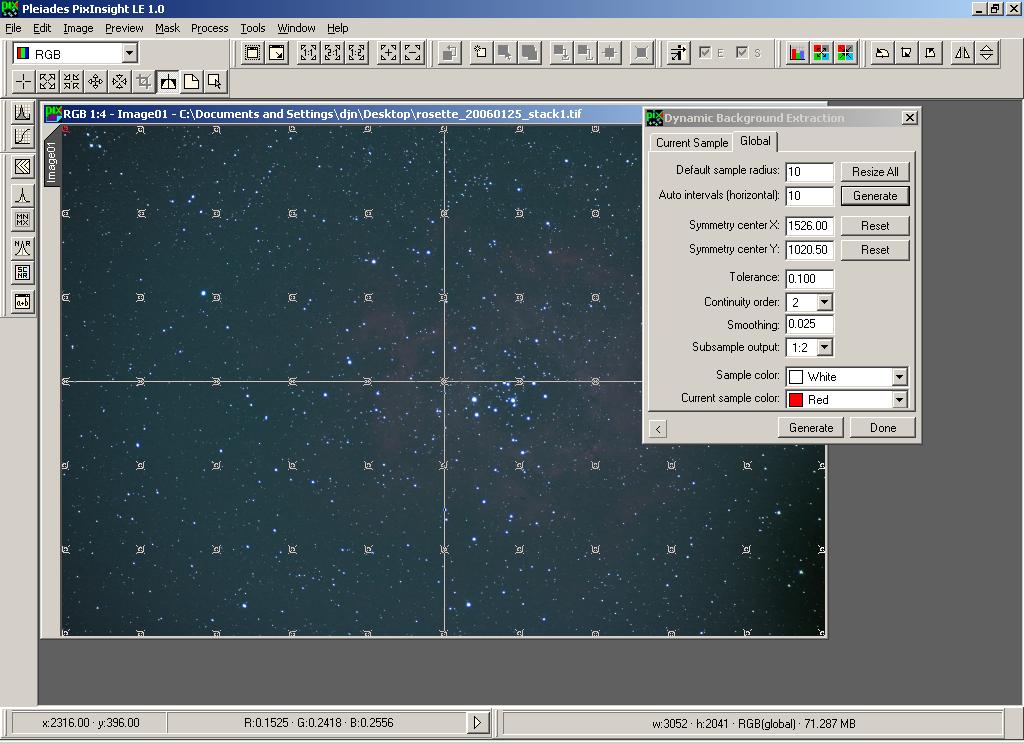
DBE generates a background image by sampling the image at regular intervals. Click on the "Global" tab on the DBE dialog window. The DBE dialog box has various controls that allow you to use symmetry and smoothing and so on but for the moment we will accept the defaults. The "Generate" button on the Global tab (the one near the top) will generate a number of sampling points at regular intervals on your image. On images of different sizes you might want to adjust the "Default sample radius" and/or "Auto intervals" values to get a good sample of the background.
|
|
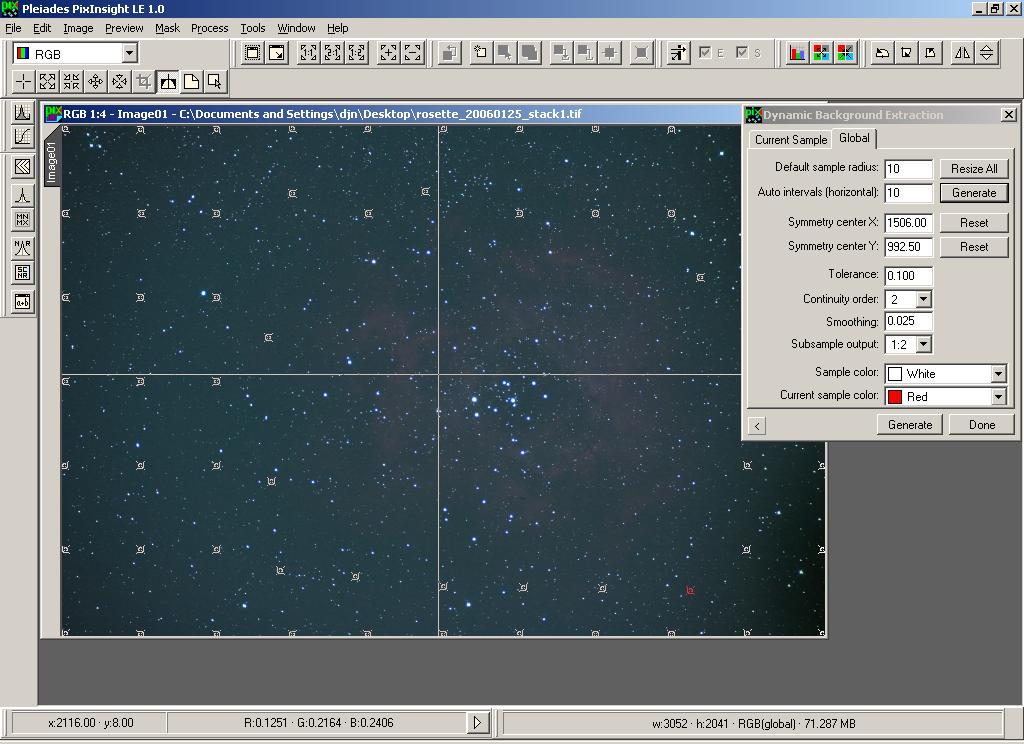
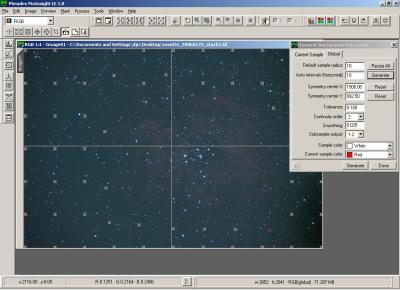
You can see here all the sample points spread across the image. The first job is to make sure they really are representative of the background. To do so you must move or remove points that are in the middle of the nebula or which coincide with a star. To select a point just click it with the mouse -- you will see it change colour -- and drag it to move it, or press the Del key on your keyboard to remove it completely. Below, I have removed points in the nebula and moved a few.
|
|
|
|
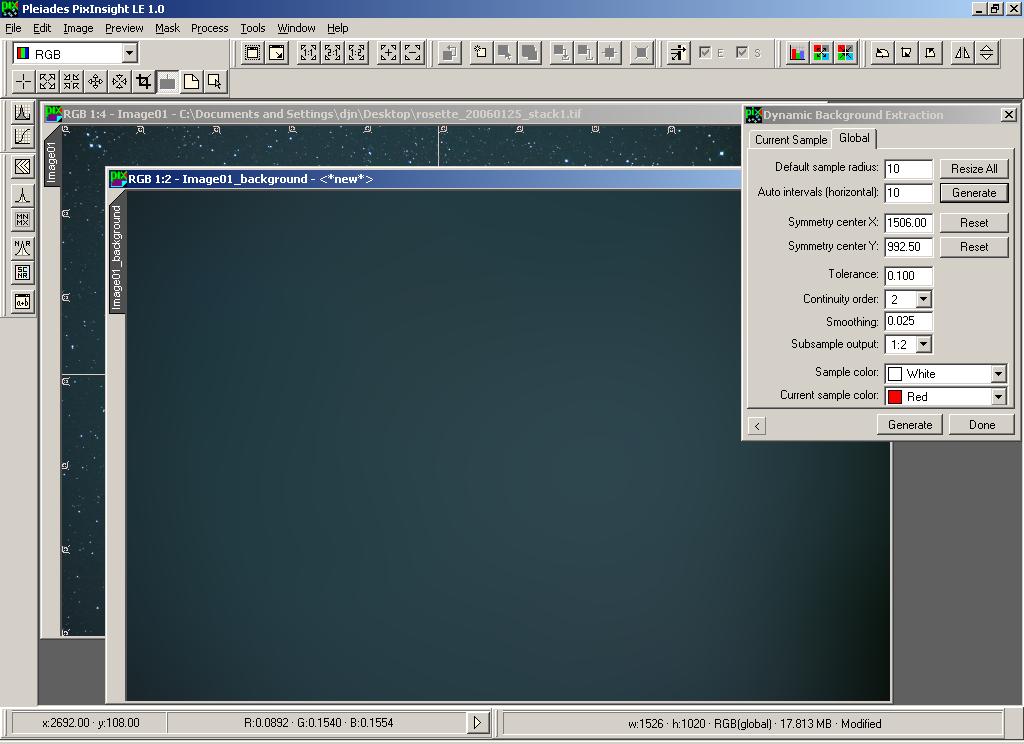
The next step is to generate the extracted background itself. To do so click the other Generate button, which is located at the bottom of the DBE dialog window, and is not actually on a tab. You will see a new image created as shown. Notice that PixInsite LE has automatically given it a name: Image01_background.
Note that the background image created is half the size of the image being analysed by default. When it is used for processing it will be resampled up. For small images captured using the webcam I normally change the "Subsample output" control in the DBE window to show "1:1". This wil ensure that the background image is full-sized.
|
|
Since the original image was named "Image01", the new one is named "Image01_background". We will see later how PixInsight LE names its image windows. These are completely independent of the underlying filenames, indeed you can have windows that don't represent files at all, as with this background image. Note how the colour of this image represents the background of the main image, including the vignetting.
We are now going to subtract the background image from the main image. Before doing so we have to cancel the DBE session. This is fine because we have finished using it to create the background image. Click the "Done" box of the DBE dialog window. You could also click the "X" close button of the DBE dialog, in which case you would be prompted to confirm that you really meant to cancel the DB session. If you wish to keep the DBE session open on Image01, you can continue by selecting Duplicate on the File menu to create a duplicate of Image01 (it will be called Image02), but without the active DBE session. Then work on Image02 instead. If the DBE didn't work quite as you wanted, you can close Image02 and try again.
|

|
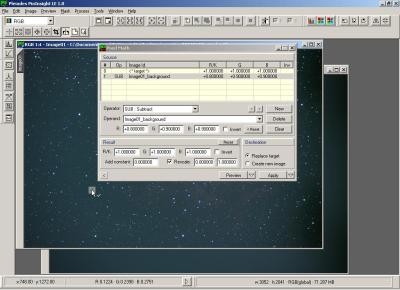
3. Subtracting the background
|
To subtract the background image from the main image we will use a PixInsight LE process called Pixel Math. Click the Pixel Math icon or select it from the Process->General menu (notice the icon on the menu is the same as the one on the toolbar).
The Pixel Math window will initially have no entries so click New to add one. The Operator (what to do) will default to No Operation, so click the drop-down list and choose "Subtract". Next click the Operand (what to do it with) drop-down list and select our background image, ie. "Image01_background".
The "R", "G", and "B" values below contain values by which the background image will be multiplied before subtracting it from the main image. In theory you should leave these at 1.0 but I often reduce them to say 0.9 to avoid an artificially dark sky background, and frequently reduce the red one step more, to 0.8 to avoid accidentally subtracting any red nebula from the image.
Finally you must choose whether the result will replace the original image, or whether a new image will be created. For now I'll leave this on "Replace Target".
|
To apply a process to an image in PixInsight LE, you can use one of two methods. The simplest is to just pick up with the mouse the small "<" button at the bottom-left of the Pixel Math window, and drop it on the image window.
As you move the mouse around, dragging this icon with it, each image window the pointer passes over will spring to the top, so that you can drop the icon on it. Make sure you drop the button on the "Image01" window and not the "Image01_background"!
When you do so you will see the process window appear, showing progress of the operation. You can click Abort if you want to stop the process at any stage.
|
|
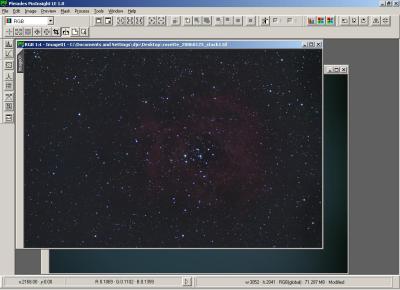
The result of the Pixel Math transform, and after closing the Pixel Math window, is shown here. You can see the background is much darker than the original, while the nebula should be unaffected. Note also the vignetting has been eliminated.
One thing you might want to try: Select Undo PixelMath Transform from the Edit menu to return the image to its original state (Note, PixInsight LE has only ONE level of undo). Then re-open the Pixel Math window (if you closed it), which will still contain the settings you used. Change the Operator from "Subtract" to "Absolute Difference", and re-run the process. The result might be preferable to that obtained using Subtract. If not, Undo again, change back to Subtract and continue.
|
|
|
|
 |
|
All text and images copyright and may not be used without permission
|
|