|
|
5. Using a Mask
|
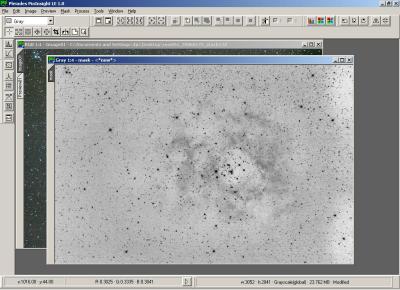
One feature of many graphics programs that I miss with PixInsight is the ability to select portions of the image using the mouse, and apply transformations only to the selected portion.
However PixInsight LE does has the "Mask" facilty, which means using another image as a mask through which transformations are applied. In other words, the amount by which a transformation (such as histogram, curves, or even Pixel Math) is applied to a particular point in an image depends on the intensity of the mask image at that point. Bright white in the mask means the transformation will be fully applied, while black means it will not be applied to that point at all. Variations between black and white (shades of grey, or other colours) means that the transformation will be applied to an extent depending on the colour (of the mask, not the original).
|
It is common to want to apply a transformation to all except the really bright bits (ie. the stars). In other words we want to apply the transformation more where the image is dark, and less where the image is bright. This means a good mask for applying the process to an image will be based on the inverse of that image, or more precisely the inverse of the luminance.
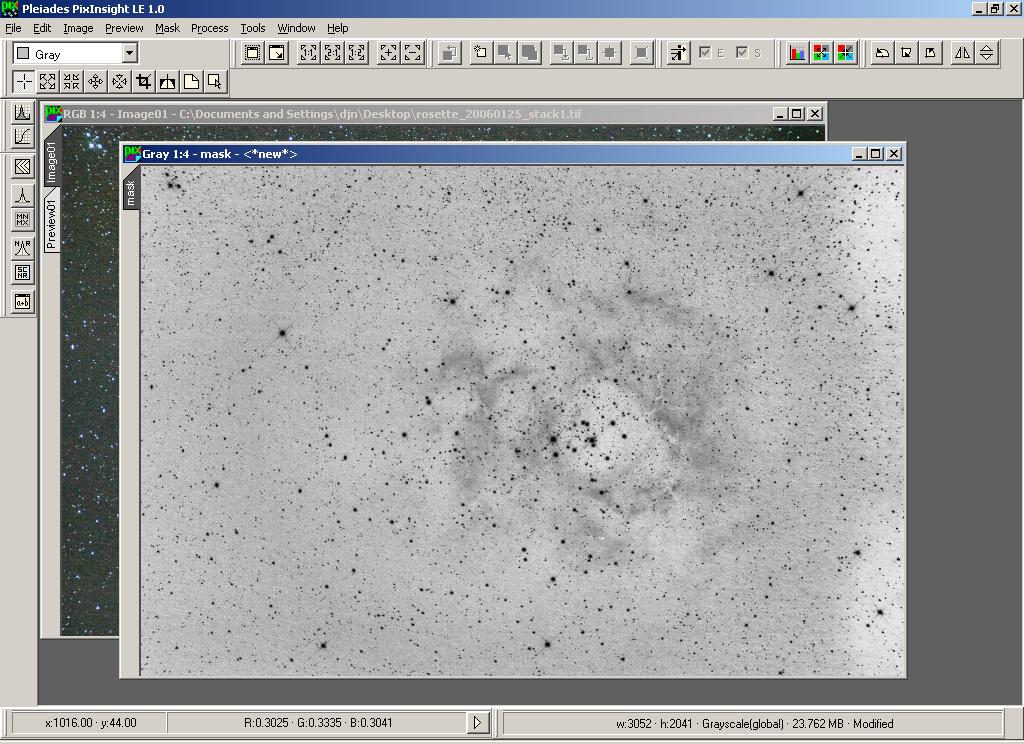
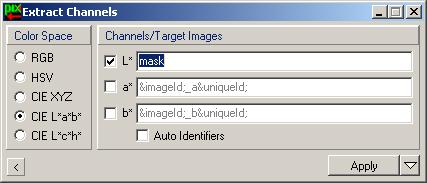
To extract the luminance use the Extract Channels function on the Process->Colour Spaces menu. Select the CIE L*a*b* colour space, and deselect the a and b channels. De-select Auto Identifiers and enter the name "mask" in the box as shown. Applying this process to Image01 will create a new image window containing the luminance channel. Then invert it using Image->Invert.
|
 After inverting the mask adjust the histogram a little, so the dark and light areas are more distinct.
|
|
|
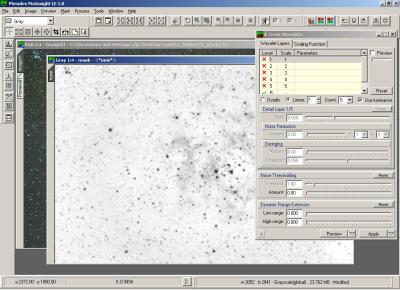
Now we must blur the mask so there are no hard transitions between areas. The easiest way is to use the A Trous Wavelets transformation, which can also be used for enhancing the image, but which for now we will use for simply blurring it.
Open the A Trous Wavelet window using the Process->Wavelets menu or the equivalent toolbar button, select "5" in the Count box, and simply disable the first five levels by double-clicking the green ticks (check marks) so that they change into red crosses. Then apply the transformation to the inverted image by dragging the process icon to it.
|
|
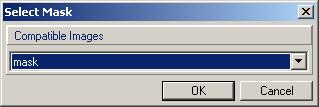
Now the mask has been created we can apply it to our image. Click on the title bar of Image01 and choose Select Mask from the Mask menu. The Select Mask box has a drop-down list that will show a list of loaded images that are suitable for using as a mask, that is, they have the same pixel dimensions as the current image. Unless you've been opening other windows there will be only one in the list, and that's the one we called "mask". Choose it and click "OK".
|
|
|
On selecting the mask the main image will immediately change to reflect the mask. All areas in Image01 where the mask is dark, will go darker. This shows us where the mask is acting, but I don't find it very useful for continuing processing so you can turn that feature off by deselecting Show Mask on the Mask menu.
|
|
|
|
 |
|
All text and images copyright and may not be used without permission
|
|
|
|