6. Exponential Transform - PIP
|
When processing astronomy photos it is often desirable to enhance the faint areas of the image. However simply boosting the whole image will cause the brighter areas to become too bright. Various "exponential transform" methods exist to cope with this, including variations of the so-called DDP("Digital Development Process") which boosts the dim parts of the image without affecting the brighter parts too much.
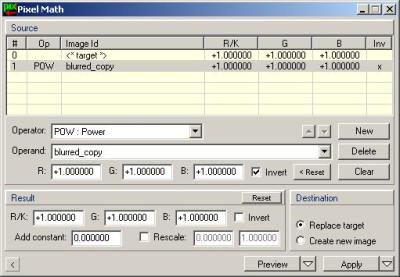
One of the processes described on the PixInsight website is called PIP - the Power of Inverse Pixels. This involves using the Pixel Math window to apply a blurred copy of an image using the Power transformation. The whole thing is masked using a mask as we have defined, and achieves the enhancement of dark areas without overprocessing the highlights. This is very useful for images of faint nebulae.
|
|
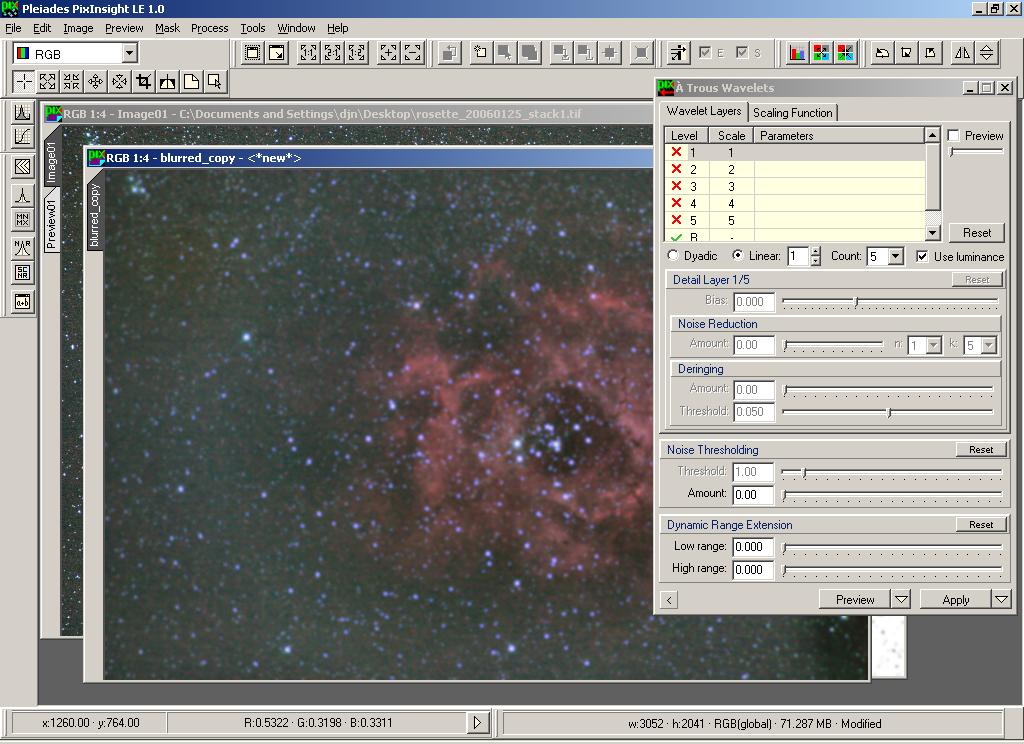
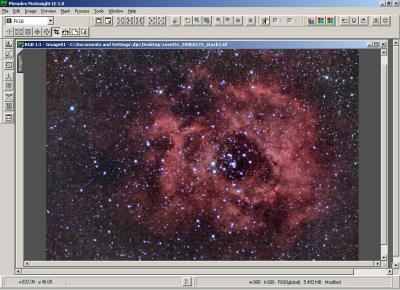
The first thing we need to do is create a copy of Image01 using the Image->Duplicate menu. Then, blur it using the A Trous Wavelet transform as for the mask.
Here, I have also changed the window's title to "blurred_copy", using the Image->Set Identifier option.
|
|
|
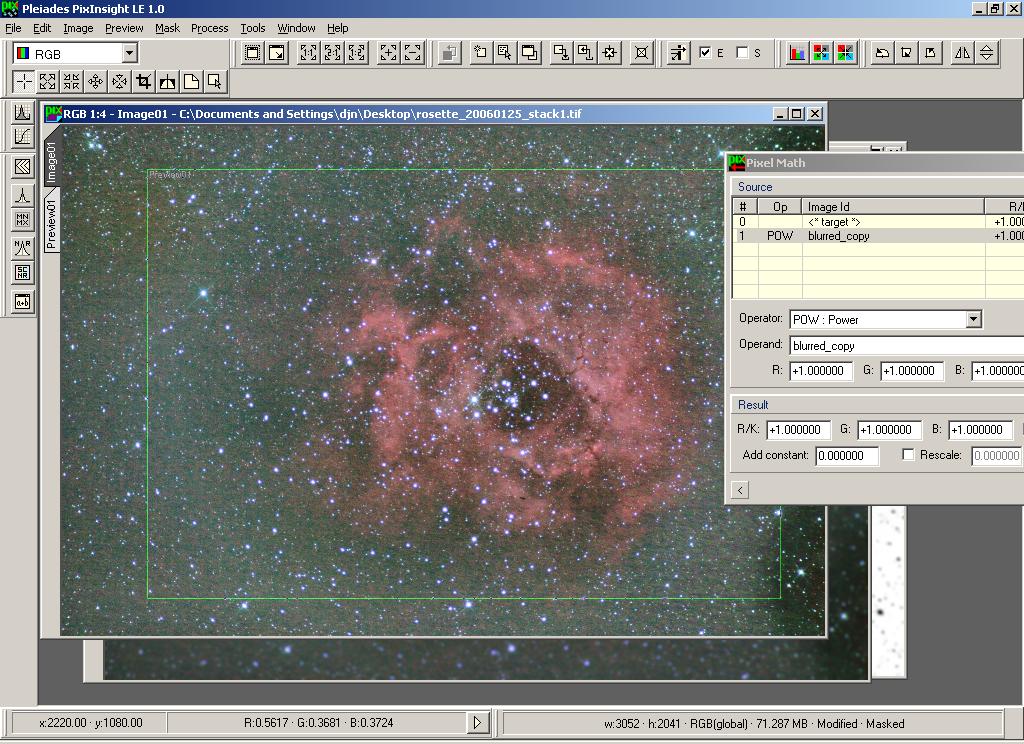
To perform the PIP process open the Pixel Math window again. Here are the settings. Notice the multipliers are back to their default settings of 1, and the operand has the Invert flag set.
|
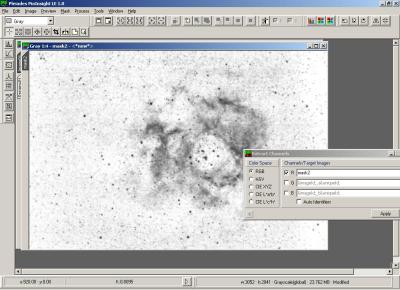
After the PIP operation has been applied to the image, the result is as shown. You can see that the nebula has indeed been boosted in the faint areas, although the insufficiently-subtracted background is now more of a problem. Using the colour channel drop-down at the top-left ( ), I can view the different aspects of this image. I notice that while the stars are promenent mainly in the blue channel the nebula is not surprisingly mostly red. For this reason I am going to create another mask from the inverse of the red channel and use use it while applying curves and histogram transformations. ), I can view the different aspects of this image. I notice that while the stars are promenent mainly in the blue channel the nebula is not surprisingly mostly red. For this reason I am going to create another mask from the inverse of the red channel and use use it while applying curves and histogram transformations.
|

|
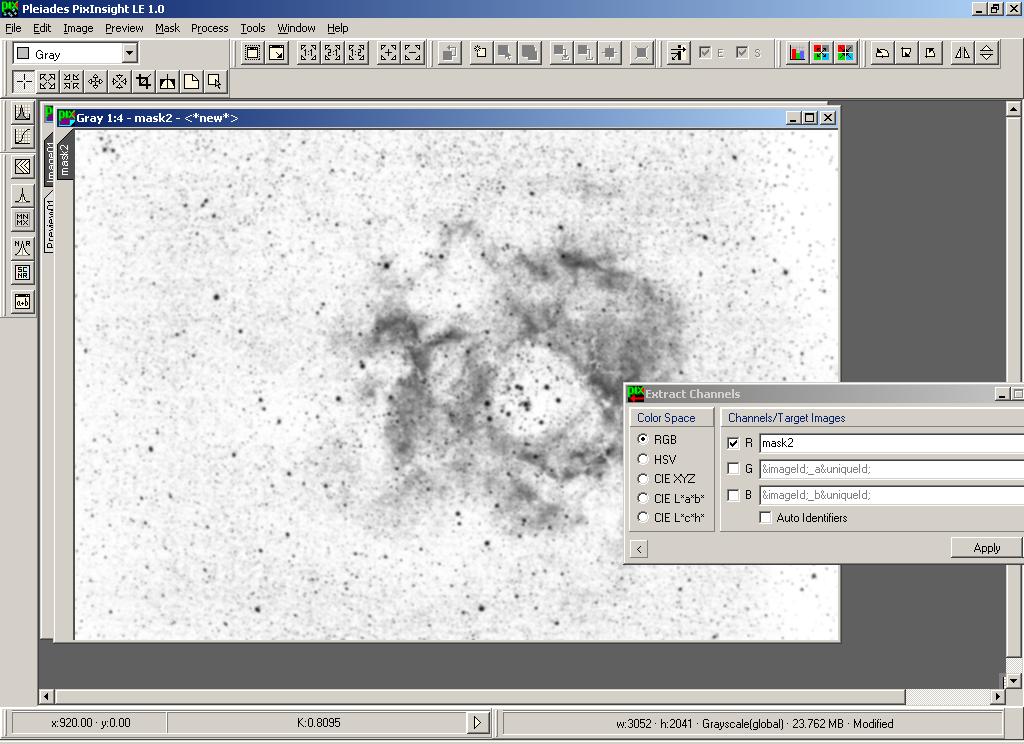
The red channel can be extracted just as we did the luminance earlier: Using the Extract Channels tool. This time using the RGB colour space and de-selecting G and B. I've adjusted the histogram of the result and blurred it slightly as before.
The result of setting this as a mask for Image01, then applyng curves and histogram transformations is shown below. |
|

|
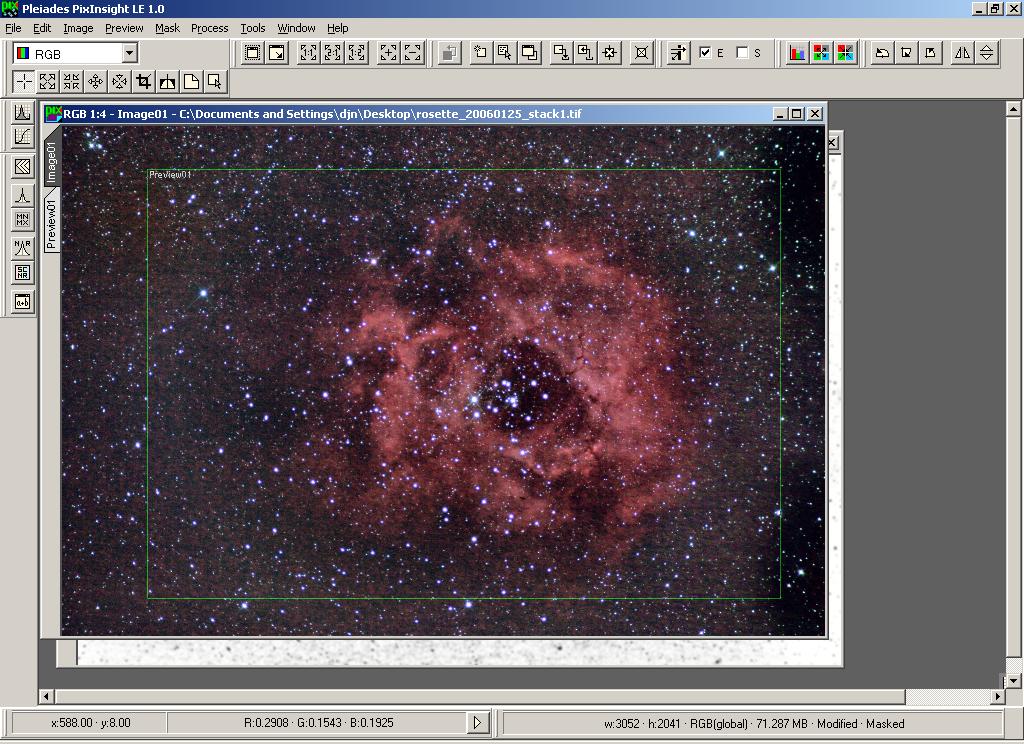
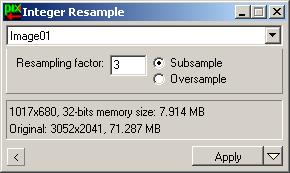
In order to deal with that background, I am going to crop the image to remove the outer edges. I am also first going to resize it to one-third, since I have been working on the full-sized image all along, which I have decided is not the preferred final image size.
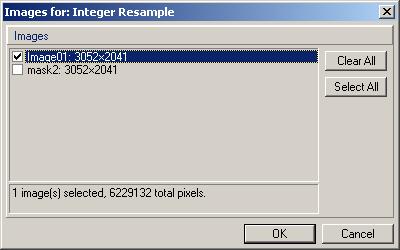
To resize the image I use the Integer Resample function on the Image->Geometry menu. This provides a quick way to up-or-downsize an image by an integer multiple (ie. multiply or divide the image scale by 2, 3, 4 and so on). By way of illustration, after selecting 3 as the scale factor I am going to click "Apply" rather than drag the process icon. That makes a window pop-up with a list of open image windows to which you can apply the process. All processes work in this way. If you chose the one(s) you want and click OK, then further clicks of the process button will automatically apply to the selected image (you can change the selection next time by clicking the arrow next to the Process button, instead. Aside from this resample command, most process windows have a Preview button that works in a similar way.
After resizing, the image is likely to be too small. You can zoom the image in to normal size by clicking the 1:1 button (or pressing Ctrl+1) or make it half size by clicking the 1:2 button (or pressing Shift+Ctrl+2).
To crop the image I will use the Dynamic Crop/Rotate tool. Select this by clicking the button:  or pressing Alt-D, upon which the cursor will change to indicate the mode. Click and drag with the mouse to indicate the area you want to crop. This will make the Dynamic Crop/Rotate tool appear so you can confirm the size and position of the crop. When you are happy click OK and the image will be cropped to the new size, as shown below. or pressing Alt-D, upon which the cursor will change to indicate the mode. Click and drag with the mouse to indicate the area you want to crop. This will make the Dynamic Crop/Rotate tool appear so you can confirm the size and position of the crop. When you are happy click OK and the image will be cropped to the new size, as shown below.
|
|
|
|
|
|
|
 |
|
All text and images copyright and may not be used without permission
|
|